
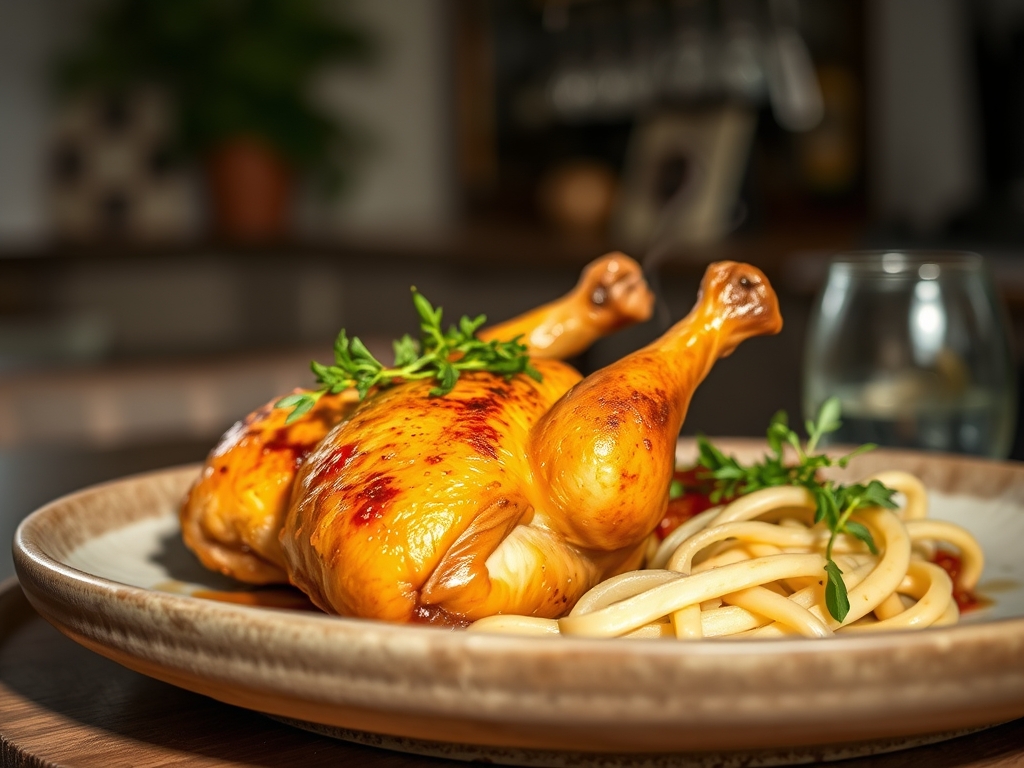
Close your eyes and listen for the sound of a knife edge cracking through a mahogany crust. That specific, shatter-crisp resonance is the hallmark of legendary ina garten roast chicken recipes, where the bird emerges from the oven glistening in a pool of golden butter and herb-infused juices. We are not just making dinner; we are engineering a masterpiece of thermal physics and aromatic chemistry.
Achieving that iconic Barefoot Contessa result requires more than just a hot oven. It demands an understanding of how moisture behaves under high heat and why fat is the ultimate conductor of flavor. When you master these six essential pillars, you move beyond following a card and start cooking with intuition. We are looking for meat that pulls away from the bone with zero resistance and skin so rendered it shatters like glass. Grab your favorite apron and a glass of crisp white wine; we are about to turn your kitchen into the most fragrant room in the house.
The Gathers:
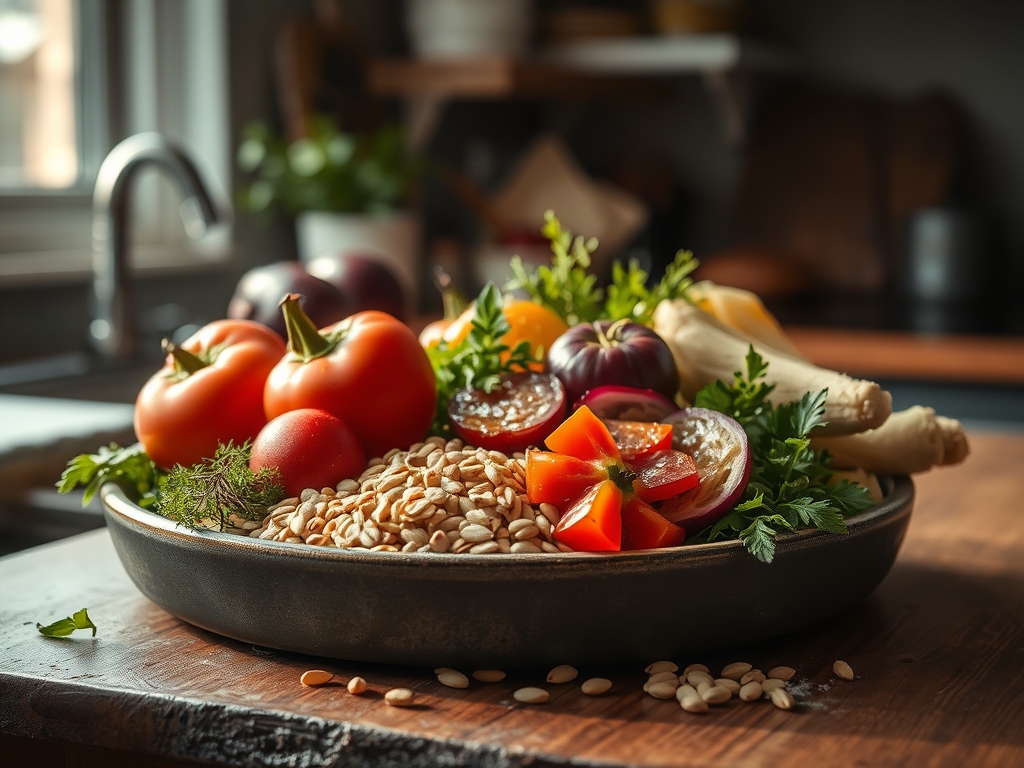
To execute this properly, your mise-en-place must be precise. Start with a four to five pound roasting chicken, preferably air-chilled to ensure the skin is not waterlogged. You will need a heavy-bottomed roasting pan or a large cast-iron skillet to facilitate even heat distribution. For the aromatics, gather a whole head of garlic sliced crosswise, two thick lemons, and a massive bundle of fresh thyme. The fat source is non-negotiable: high-quality unsalted butter with a high butterfat content.
Smart Substitutions: If you lack fresh thyme, a blend of rosemary and savory works, but avoid dried herbs as they lack the volatile oils needed for a true infusion. If you are out of lemons, a splash of verjus or a tablespoon of apple cider vinegar added to the pan drippings provides that essential piquant acidity. For a deeper umami profile, swap the standard table salt for Maldon sea salt or a high-quality kosher salt to enhance the tactile crunch of the crust.
The Clock
The "Chef's Flow" for this bird is about rhythm rather than rushing. Expect 20 minutes of active prep time, followed by 75 to 90 minutes of roasting. However, the most critical window is the 20-minute rest period post-oven. Total time from fridge to table is roughly two hours. Do not attempt to truncate the resting phase; doing so causes the viscous internal juices to flee the muscle fibers, leaving you with a dry bird.
The Masterclass

1. The Desiccation Ritual
Remove the bird from the packaging and pat it down with surgical precision using paper towels. The skin must be bone-dry. Any residual surface moisture will create steam, which is the enemy of the Maillard reaction. Use a digital scale to measure your salt if you are new to seasoning; you need roughly one teaspoon of kosher salt per pound of meat.
Pro Tip: This is known as surface dehydration. By removing water, you allow the heat to immediately begin the process of enzymatic browning rather than wasting energy evaporating surface liquid.
2. Cavity Infusion and Trussing
Stuff the cavity with the halved lemon, garlic, and thyme. Do not overpack it, as you want hot air to circulate. Use kitchen twine to tie the legs together and tuck the wings under the body. This creates a uniform shape, ensuring the delicate breast meat does not overcook before the thighs reach a safe temperature.
Pro Tip: Trussing minimizes the surface area of the cavity, which slows down the internal airflow. This creates a "steam chamber" inside the bird that keeps the white meat moist while the exterior roasts.
3. The Butter Barrier
Slather the exterior with softened butter or a high-smoke-point oil. Use your hands to get under the skin of the breast without tearing it. This creates a fat-rich environment that deepens the color and adds a luxurious mouthfeel.
Pro Tip: Fat acts as a thermal conductor. It fills the microscopic gaps in the skin, allowing heat to transfer more efficiently and evenly across the entire surface of the chicken.
4. High-Heat Initiation
Start the bird in a preheated 425 degree Fahrenheit oven. This aggressive heat triggers the rendering of the subcutaneous fat. You should hear a distinct sizzle within the first ten minutes. If the pan remains silent, your oven calibration might be off.
Pro Tip: High initial heat causes the proteins in the skin to cross-link quickly. This "sets" the skin, trapping moisture inside the muscle fibers while the outside crisps.
5. The Root Vegetable Bed
Surround the bird with thick-cut carrots, onions, and fennel. These vegetables will roast in the rendered chicken fat (schmaltz), caramelizing into sweet, savory gems. Use tongs to toss them halfway through to ensure they are fully coated in the liquid gold at the bottom of the pan.
Pro Tip: As the vegetables release their water, they create a localized humid environment in the lower half of the oven. This prevents the pan drippings from burning and scorching your saucier base later.
6. The Carryover Rest
Once your instant-read thermometer hits 160 degrees Fahrenheit in the thickest part of the thigh, pull the bird. Transfer it to a carving board and tent it loosely with foil. Let it sit for at least 15 to 20 minutes.
Pro Tip: This accounts for thermal carryover. The internal temperature will rise another 5 degrees while resting. More importantly, the protein structures relax, allowing the juices to redistribute and stay within the meat when sliced.
The Deep Dive
On a macro level, a standard serving of roast chicken is a protein powerhouse, rich in Vitamin B12 and selenium. To keep this Keto-friendly, simply double down on the butter and skip the root vegetables in favor of radishes or cauliflower. For a Vegan alternative, use this same aromatic profile (lemon, garlic, thyme) on a whole roasted head of cauliflower basted in olive oil.
The Fix-It:
- Soggy Skin: If the skin isn't crisping, crank the heat to 450 for the last 10 minutes or use a hand-held kitchen torch for targeted browning.
- Burnt Pan Drippings: If the juices are smoking, add a half-cup of water or chicken stock to the pan to lower the temperature of the fats.
- Dry Breast Meat: If the breasts are cooking too fast, cover them with a small "shield" of aluminum foil while the legs finish.
Meal Prep: To reheat leftovers without that "warmed-over" flavor, avoid the microwave. Use a heavy-bottomed skillet with a splash of stock and a lid. This gently re-steams the meat, maintaining the cellular integrity of the protein.
The Wrap-Up
Mastering ina garten roast chicken recipes is a rite of passage for any home cook. It is the ultimate "comfort science" that combines basic physics with high-end flavor profiles. When you pull that bird out and see the shimmering, deep-amber skin, you will know you have transitioned from a recipe-follower to a true culinary artist. Now, grab your bench scraper to tidy up and get ready to serve the best meal of the week.
The Kitchen Table
How do I get the skin extra crispy?
Ensure the chicken is completely dry before roasting. Use a paper towel to pat every crevice. High heat and a light coating of fat are essential for the Maillard reaction to create that iconic, shatter-like texture on the skin.
What is the best way to tell if it is done?
Use a digital instant-read thermometer inserted into the thickest part of the thigh without hitting bone. It should read 160 to 165 degrees Fahrenheit. The juices should also run clear, not pink, when the thigh is pierced.
Can I roast the chicken in a glass dish?
It is better to use metal or cast iron. Glass does not conduct heat as efficiently and cannot withstand the high temperatures required for a proper sear. A heavy-bottomed roasting pan ensures the vegetables caramelize without burning or sticking.
Why does my chicken need to rest?
Resting allows the muscle fibers to reabsorb the juices. If you cut it immediately, the moisture will leak out onto the board, leaving the meat dry. A twenty-minute rest ensures a succulent, tender result every single time you roast.