
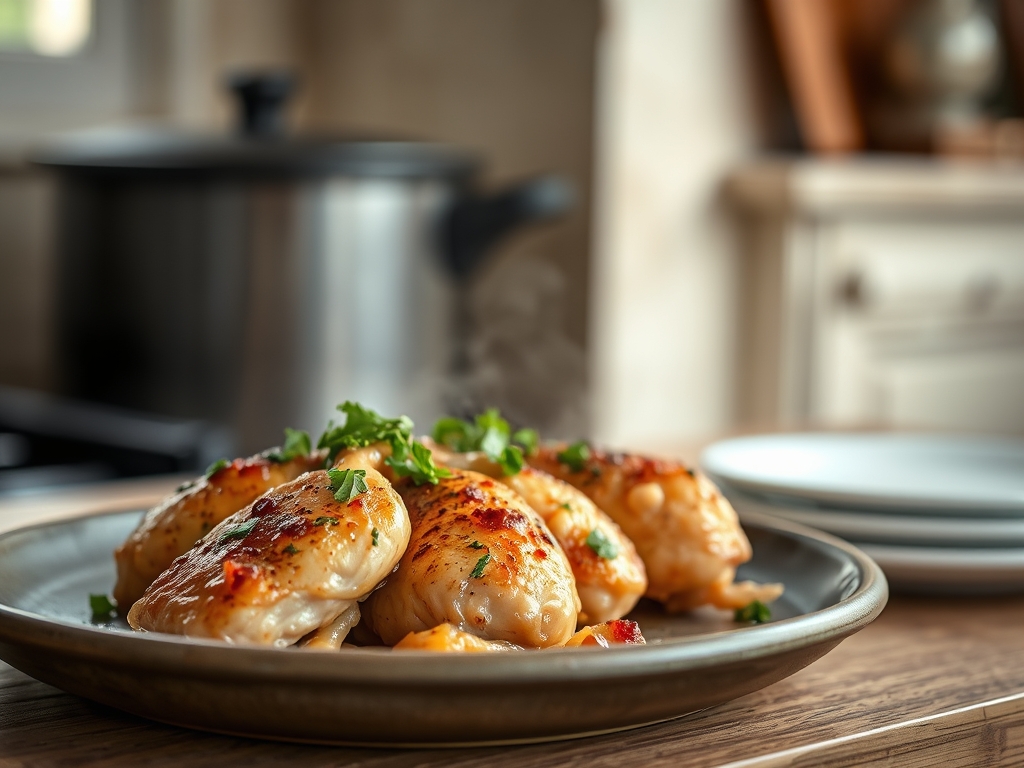
Picture the sound of a heavy-bottomed stainless steel skillet meeting a high-heat gas flame. There is a specific, frantic hiss that occurs the moment cold protein hits shimmering oil; it is the sound of the Maillard reaction beginning its transformative work. When you are hungry and short on time, mastering chicken recipes stove style is the ultimate culinary power move for the modern kitchen. You do not need an oven or a slow cooker to achieve that deep, mahogany crust or a silky, emulsified pan sauce. All you need is a basic understanding of heat conductivity and a few pantry staples to turn a bland bird into a five-star masterpiece in under twenty minutes. We are moving past the days of rubbery, overcooked poultry. Today, we are focusing on high-velocity cooking where every second counts and every degree of temperature matters. This is about efficiency without sacrificing the piquant, bold flavors that make a meal memorable. Let us get your mise-en-place ready because once the burner is on, the chemistry happens fast.
The Gathers:
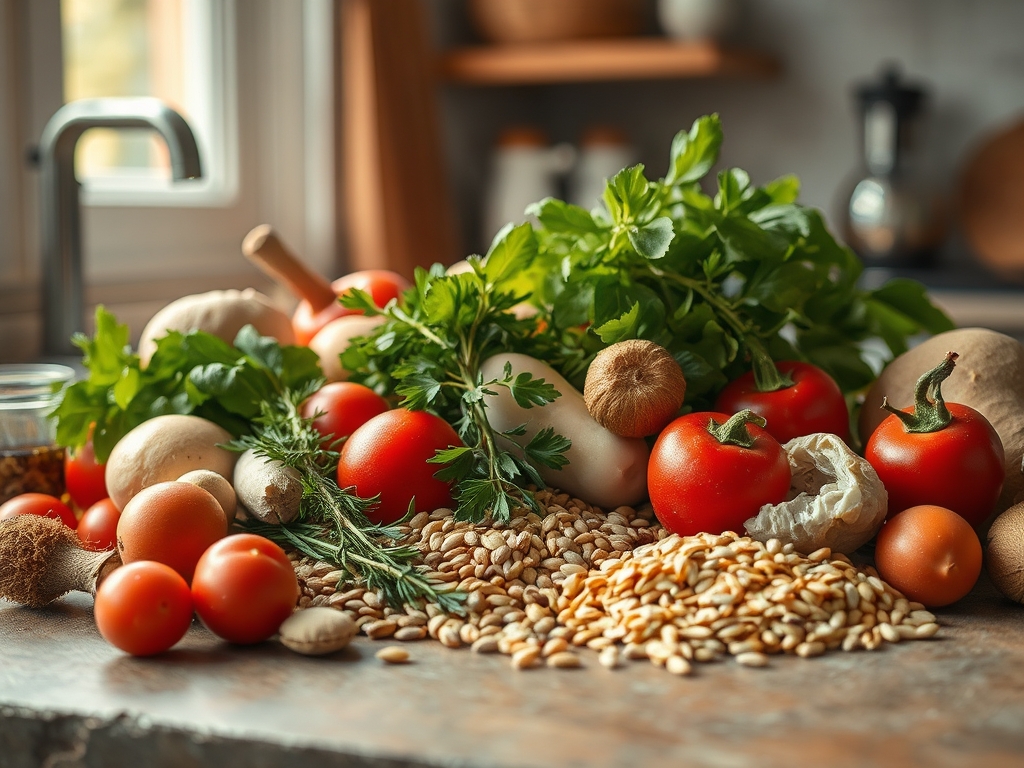
To execute these dishes, your counter should look like a laboratory of flavor. Start with your protein: boneless, skinless thighs are the gold standard for stovetop cooking because their higher fat content allows them to render beautifully without drying out. If you prefer breasts, they must be pounded to a uniform thickness using a meat mallet to ensure even thermal distribution. You will need a high-smoke-point fat, such as avocado oil or clarified butter (ghee), to prevent the lipids from breaking down and turning acrid at high temperatures.
Your aromatic kit should include fresh garlic, ginger, and shallots. Use a microplane to grate these into a fine paste; this increases the surface area, allowing the essential oils to infuse the cooking fat almost instantly. For the liquids, keep a bottle of dry white wine or a splash of fortified rice vinegar nearby to deglaze the pan. This process lifts the fond, those delicious caramelized brown bits stuck to the bottom, and incorporates them into your sauce.
Smart Substitutions:
If you are out of fresh aromatics, high-quality garlic oil can provide that pungent base. For a dairy-free creaminess, full-fat coconut milk offers a viscous mouthfeel similar to heavy cream. If you need a gluten-free thickener, arrowroot powder creates a more translucent, glossy finish than traditional flour and reacts better to rapid temperature shifts.
The Clock
Efficiency in the kitchen is governed by "Chef's Flow," the ability to overlap tasks so that no motion is wasted. For these chicken recipes stove favorites, your active prep time should never exceed ten minutes. The cooking phase typically lasts twelve to fifteen minutes.
The flow works like this: while your skillet preheats (a crucial step for protein release), you chop your aromatics. While the chicken undergoes its initial sear, you whisk together your sauce components. By the time the chicken reaches its carryover cooking phase, your sauce is already reducing. This staggered approach ensures that the meal hits the table at the peak of its sensory appeal, with the meat at exactly 165 degrees Fahrenheit and the sauce at its ideal viscosity.
The Masterclass
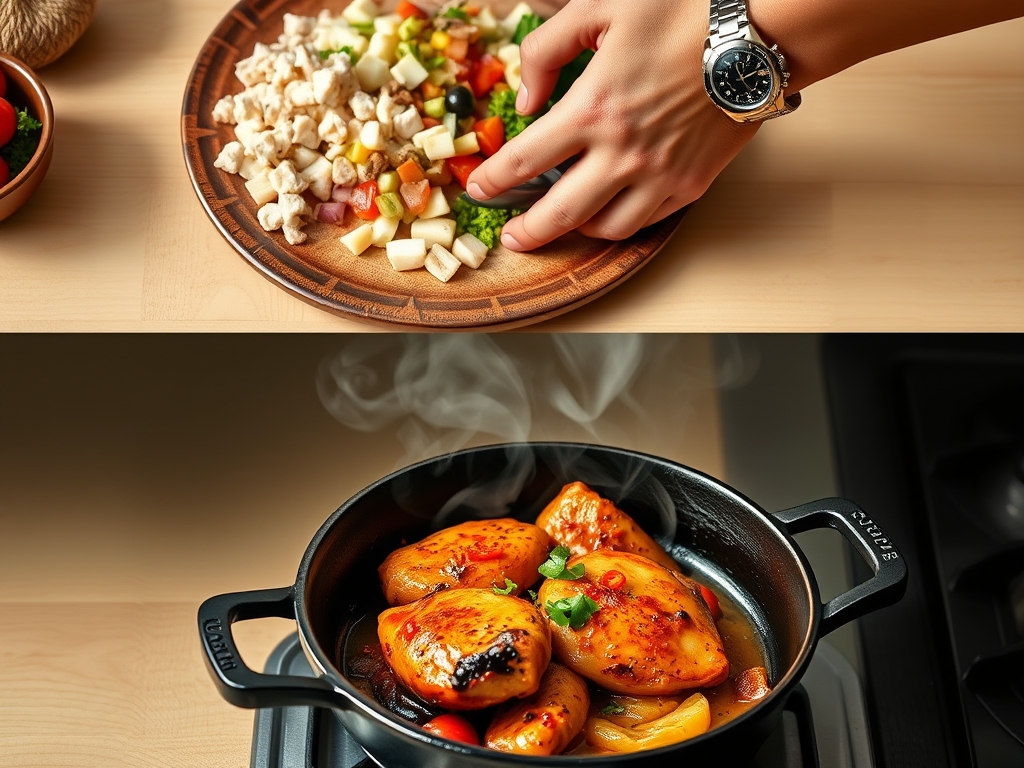
1. The High-Heat Sear
Place your seasoned chicken into the hot oil. Do not crowd the pan, as this causes the temperature to drop and the meat to steam in its own juices rather than sear. Use tongs to press the meat down, ensuring maximum contact with the metal.
Pro Tip: This is enzymatic browning. The amino acids and sugars react to create hundreds of different flavor compounds. If the meat resists when you try to flip it, the crust has not fully formed; wait for it to release naturally.
2. The Deglaze and Lift
Once the chicken is browned and removed, pour your liquid of choice into the hot skillet. Use a wooden spoon or a bench scraper to aggressively scrape the bottom of the pan.
Pro Tip: This is the "deglazing" phase. The liquid dissolves the fond, which contains concentrated umami. This step is the difference between a flat sauce and one with professional depth.
3. The Emulsification
Reduce the heat and whisk in your fats or thickeners. If using butter, add cold cubes one at a time while whisking vigorously to create a stable emulsion.
Pro Tip: Cold butter creates a "beurre monte" effect. The milk solids and fats stay suspended in the liquid, creating a velvety texture rather than a greasy, separated mess.
4. The Final Tempering
Return the chicken to the pan and toss it in the bubbling sauce for the final sixty seconds. This allows the protein to absorb the flavors without overcooking the interior.
Pro Tip: Thermal carryover means the internal temperature will rise about 5 degrees after you remove it from the heat. Pulling the chicken at 160 degrees ensures it reaches a perfect 165 degrees on the plate.
The Deep Dive
From a macro nutrition perspective, chicken is a lean powerhouse. A standard 6-ounce serving provides roughly 42 grams of protein with minimal carbohydrates, making it a staple for almost any diet.
Dietary Swaps:
- Keto: Replace any flour-based thickeners with xanthan gum or simply reduce heavy cream until it coats the back of a spoon.
- Vegan: While this guide focuses on chicken, the same stovetop techniques apply to extra-firm tofu or seitan. Ensure you press the moisture out of the tofu first to achieve a similar sear.
- GF: Use tamari instead of soy sauce and cornstarch as your primary slurry agent.
The Fix-It:
- The Meat is Dry: You likely skipped the "rest" period. Let the chicken sit for five minutes before slicing to allow the juices to redistribute through the muscle fibers.
- The Sauce is Broken: If your sauce looks oily, it has "split." Add a teaspoon of warm water and whisk violently to re-establish the emulsion.
- The Garlic is Bitter: You added it too early. Aromatics should only cook for 30 to 60 seconds before liquid is added to prevent burning.
Meal Prep Science:
To maintain "day-one" quality, store the chicken and sauce together. When reheating on the stove, add a tablespoon of water or broth and cover the pan. This creates a steam chamber that rehydrates the protein fibers, preventing that "leftover" texture.
The Wrap-Up
Mastering chicken recipes stove techniques is about more than just following a list of ingredients; it is about understanding the physics of your kitchen. When you learn to control the flame and respect the sear, you unlock a world of culinary possibilities that take less time than ordering takeout. You are now equipped with the technical knowledge to troubleshoot any pan sauce and the confidence to sear like a pro. Go grab your favorite skillet and let the chemistry do the heavy lifting.
The Kitchen Table
How do I keep stovetop chicken from getting rubbery?
Avoid overcooking by using a digital thermometer. Pull the chicken off the heat at 160 degrees Fahrenheit. The internal temperature will continue to rise to the safe 165-degree mark through carryover cooking while the meat rests and retains its juices.
What is the best pan for stovetop chicken?
A heavy-bottomed stainless steel or cast iron skillet is best. These materials retain heat efficiently, ensuring a consistent sear and even cooking. Non-stick pans often fail to produce the necessary "fond" required for a high-quality, flavorful pan sauce.
Can I cook frozen chicken on the stove?
It is not recommended. The exterior will burn before the interior reaches a safe temperature, leading to a dry, unevenly cooked result. Always thaw chicken in the refrigerator or a cold water bath before attempting high-heat stovetop cooking for safety.
How do I get a crispy crust without deep frying?
Pat the chicken completely dry with paper towels before seasoning. Moisture is the enemy of the sear. Use a high-smoke-point oil and ensure the pan is shimmering hot before adding the protein to trigger the Maillard reaction immediately.