
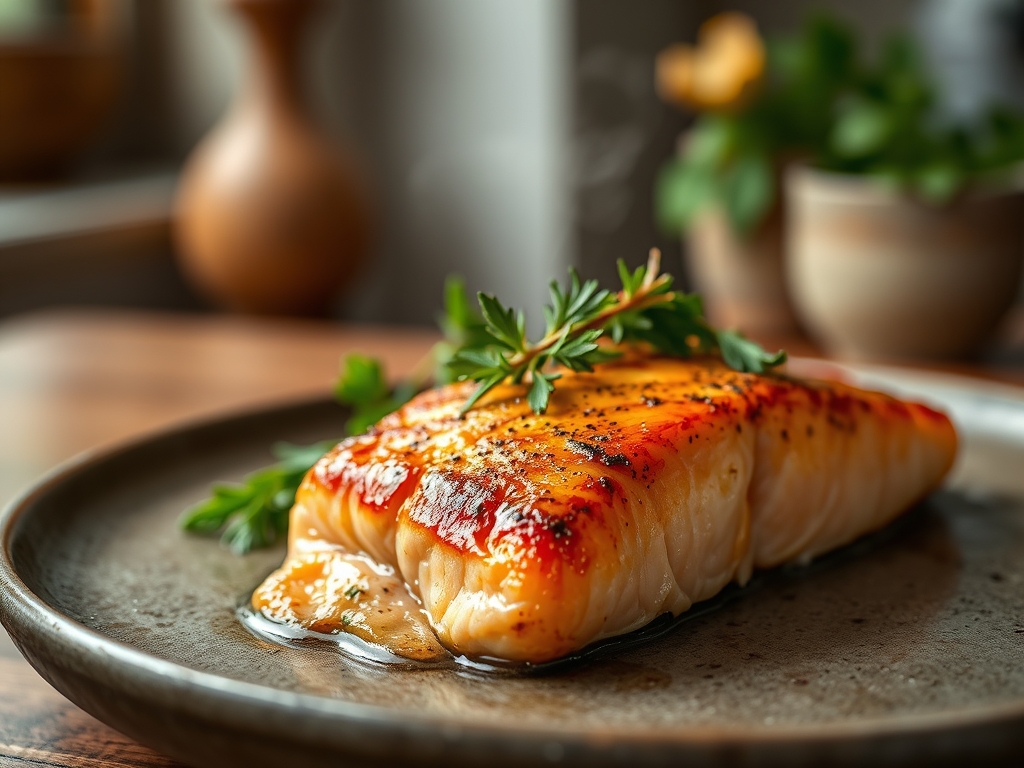
Close your eyes and listen for the sound of a high-decibel sizzle meeting cold steel. That rhythmic popping is the sound of moisture escaping and proteins transforming into a shatter-crisp armor. When you master pan seared salmon recipes easy enough for a Tuesday but polished enough for a gala, you are essentially conducting a symphony of heat and fat. We are chasing that elusive, glass-like skin and a center that flakes with the gentlest pressure of a fork.
The secret to a restaurant-grade finish is not a hidden ingredient; it is a fundamental understanding of thermodynamics. Most home cooks treat the skillet like a waiting room, but we are going to treat it like a laboratory. By the time we are done, you will understand exactly why your fish sticks to the pan and how to prevent it using nothing but physics. Grab your heavy-bottomed skillet and a stack of paper towels. We are about to turn a simple fillet into a masterclass of texture and flavor that will make your kitchen feel like a Michelin-starred station.
The Gathers:
To achieve a perfect sear, your mise-en-place must be impeccable. We start with center-cut Atlantic or King salmon fillets, ideally six to eight ounces each. These should be cold but bone-dry. Moisture is the enemy of the Maillard reaction; if there is water on the surface, the heat of the pan will spend its energy evaporating that liquid instead of browning the proteins. You will need a high-smoke-point fat like avocado oil or clarified butter. Avoid extra virgin olive oil for the initial sear, as its low smoke point will result in a bitter, acrid film.
Your toolkit is just as vital as your ingredients. You need a flexible fish spatula (often called a peltex) to slide under the delicate skin without tearing it. A heavy-bottomed stainless steel or cast iron skillet is non-negotiable for heat retention. For aromatics, gather fresh thyme sprigs, crushed garlic cloves, and a cold knob of unsalted butter for the final arroser (basting) stage.
Smart Substitutions: If you are avoiding dairy, swap the butter for a viscous macadamia nut oil to maintain that rich mouthfeel. If salmon is unavailable, steelhead trout offers a similar fat profile and structural integrity. For a piquant kick, use a microplane to zest a lemon directly over the finished fillets to cut through the fatty richness without adding excess liquid.
The Clock
Efficiency in the kitchen relies on what professionals call the Chef's Flow. This is the art of overlapping tasks so that no heat is wasted. Your total active time is approximately 15 minutes, but the preparation begins 20 minutes before the flame is even lit.
- The Temper (15 Minutes): Take the salmon out of the refrigerator. Cold fish hitting a hot pan causes the muscle fibers to contract violently, squeezing out moisture and leaving you with a tough result.
- The Prep (5 Minutes): While the fish tempers, pat it dry repeatedly. This is when you sharpen your knife and prepare your aromatics.
- The Sear (6 to 8 Minutes): This is the high-intensity phase. Most of the cooking happens on the skin side to create a thermal barrier.
- The Rest (3 Minutes): Essential for moisture redistribution.
The Masterclass
1. The Desiccation Ritual
Use a fresh paper towel to press firmly onto the skin and flesh. You want the surface to feel tacky, not slippery. Season with kosher salt only at the very last second before the fish hits the oil.
Pro Tip: Salt is a desiccant. If you salt too early, it will draw internal moisture to the surface via osmosis, ruining your chance at a golden crust.
2. Calibrating the Heat
Place your skillet over medium-high heat. Add two tablespoons of oil and wait until it begins to shimmer and show faint wisps of smoke. This indicates the oil has reached the proper viscosity to coat the pan evenly.
Pro Tip: A hot pan prevents sticking because the high heat creates an immediate steam barrier between the fish and the metal, a phenomenon known as the Leidenfrost effect.
3. The Initial Contact
Lay the salmon into the pan away from you to avoid oil splatter. Use your flexible spatula to press down firmly on each fillet for the first 30 seconds. This prevents the skin from curling as the collagen fibers contract.
Pro Tip: Pressing ensures maximum surface area contact, which accelerates enzymatic browning and creates a uniform crust.
4. The Patience Phase
Leave it alone. Do not poke, prod, or slide the fish. You will see the color of the flesh change from translucent pink to opaque beige moving upward from the bottom of the pan.
Pro Tip: When the skin is ready, it will naturally release from the pan. If it resists, the intermolecular bonds haven't broken yet; give it another minute.
5. The Flip and Infuse
Once the cook has reached 70 percent of the way up the side of the fillet, flip it gently. Lower the heat and add your butter, garlic, and thyme. Use a large spoon to infuse the hot, foaming butter over the skin.
Pro Tip: This technique, called basting, adds a layer of nutty flavor while finishing the internal cook with gentle, indirect heat.
6. The Carryover Finish
Remove the salmon when a digital thermometer reads 125 degrees Fahrenheit for medium-rare. Place it on a warm plate, skin-side up, to preserve the crunch.
Pro Tip: Thermal carryover will continue to raise the internal temperature by 5 to 7 degrees while the fish rests, bringing it to a perfect 130-132 degrees.
The Deep Dive
From a nutritional standpoint, salmon is a powerhouse of Omega-3 fatty acids and high-quality protein. A standard six-ounce serving provides roughly 34 grams of protein and 100 percent of your daily Vitamin B12. It is naturally Keto and Gluten-Free, making it a versatile anchor for almost any diet.
Dietary Swaps: To make this vegan, use the same searing technique on "steaks" of cauliflower or extra-firm tofu that has been pressed for hours. For a Paleo version, ensure your basting fat is clarified Ghee to remove all milk solids.
The Fix-It:
- The Albumin Leak: If you see white goop seeping out, you have overcooked the fish. The muscle fibers contracted too hard and squeezed out the protein. Fix it next time by pulling the fish off the heat 5 degrees earlier.
- Soggy Skin: This happens if you crowd the pan. Steam gets trapped between the fillets. Use a larger skillet or cook in batches.
- Burnt Garlic: If your aromatics turn black, they become bitter. Always add them during the last two minutes of cooking, never at the start.
Meal Prep: To reheat salmon without it turning into rubber, avoid the microwave. Use a saucier or small pan with a splash of water and a lid over low heat. This creates a gentle steam chamber that rehydrates the fats without tightening the proteins.
The Wrap-Up
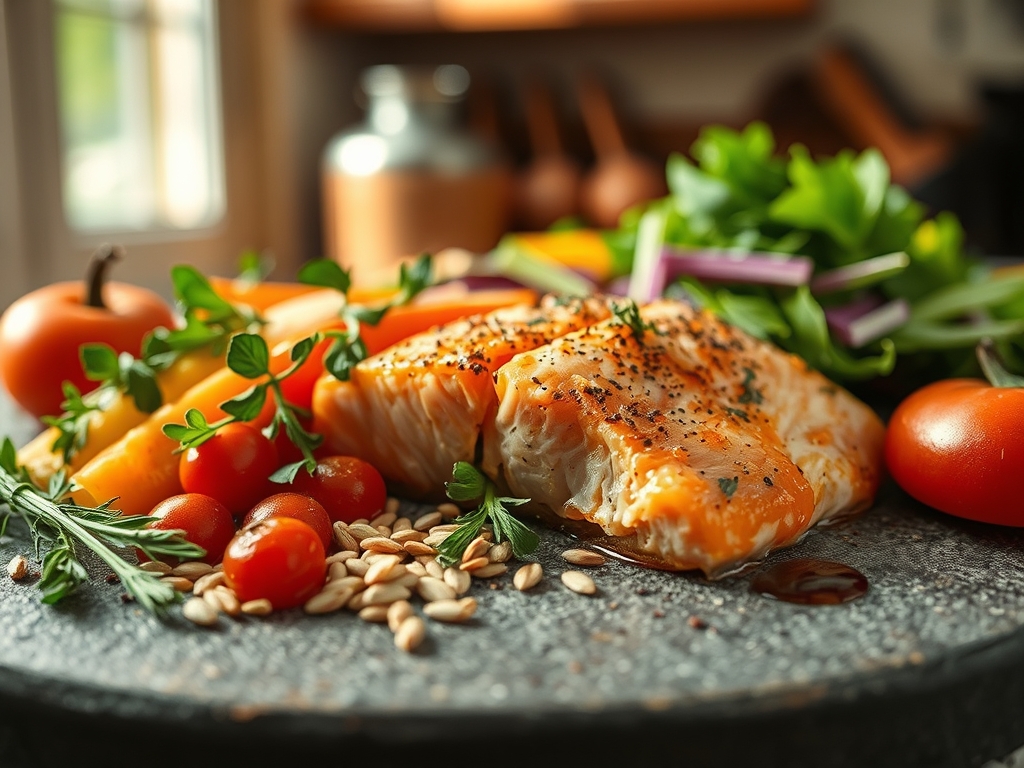
Mastering pan seared salmon recipes easy is about more than just a meal; it is about gaining confidence in the kitchen. Once you understand how to control heat and manage moisture, you can apply these same principles to scallops, chicken thighs, or even a thick-cut ribeye. The kitchen is your playground, and that golden, crackling crust is your trophy. Go ahead, serve it up with a bright gremolata or a simple side of wilted greens, and watch your friends marvel at your culinary prowess.
The Kitchen Table
How do I stop salmon from sticking to the pan?
Ensure the pan and oil are shimmering hot before adding the fish. Use a paper towel to dry the skin completely. Once placed, do not move the fillet until the proteins naturally release from the surface after 3 to 4 minutes.
Should I cook salmon with the skin on or off?
Always cook with the skin on. The skin acts as a protective thermal barrier, preventing the delicate flesh from drying out. Even if you do not intend to eat the skin, it preserves the moisture and flavor during the searing process.
What is the best oil for searing salmon?
Use oils with high smoke points, such as avocado, grapeseed, or canola oil. These fats can withstand the 400-degree temperatures required for a crisp crust without breaking down, smoking, or creating bitter off-flavors in your fish.
How can I tell if salmon is done without a thermometer?
Gently press the side of the fillet with a fork or your finger. If the flakes begin to separate easily (lamination), it is ready. The center should still look slightly translucent and feel warm, not hot, to the touch.