
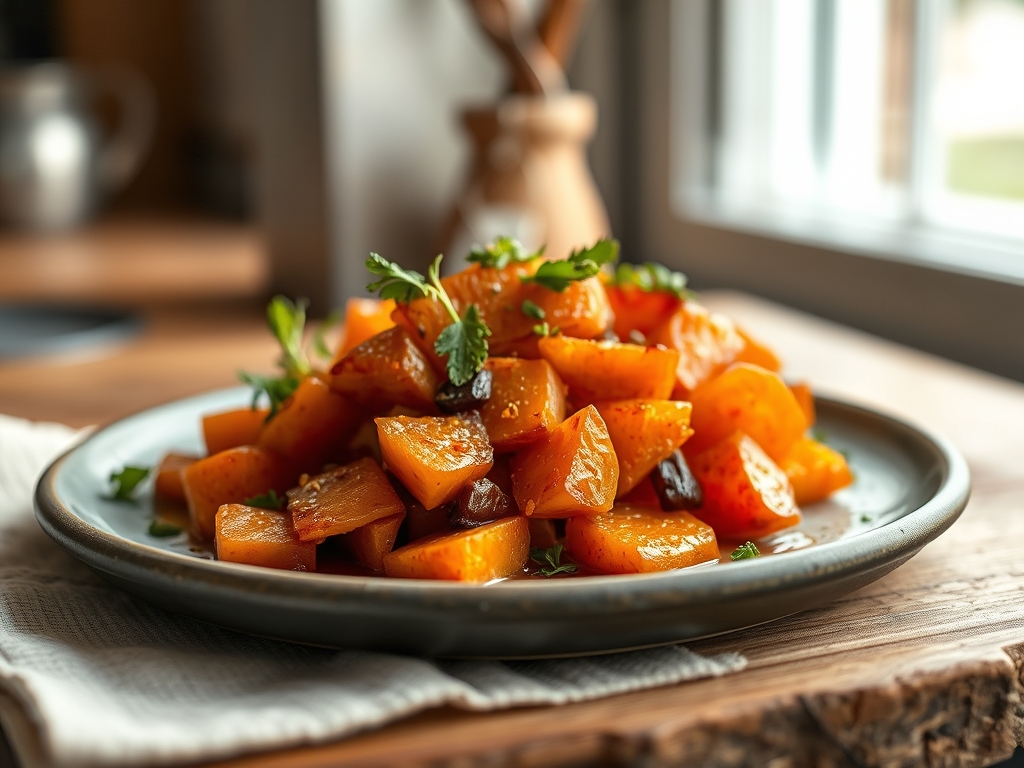
Imagine the scent of smoldering sugar and earthy vanilla drifting through your kitchen. That deep, amber aroma is the hallmark of perfectly executed caramelized sweet potato recipes. When you hit that sweet spot between a soft, velvety interior and a crisp, glass-like exterior, you have achieved the ultimate culinary flex. It is a sensory experience that turns a humble root vegetable into a sophisticated centerpiece.
The magic happens at exactly 320 degrees Fahrenheit. This is the thermal threshold where sucrose breaks down and transforms into complex, nutty compounds. We are not just roasting vegetables; we are conducting a symphony of chemical reactions. By the time we are finished, your kitchen will smell like a high-end patisserie. These recipes are designed to bridge the gap between casual weeknight sides and the kind of gourmet indulgence that makes people ask for your secret.
We are going to explore seven distinct glazes, ranging from a piquant Miso-Maple to a sophisticated Brown Butter and Sage. Each one is engineered to highlight the natural sugars of the tuber while adding layers of depth. Grab your favorite apron and let us dive into the science of the sear.
The Gathers:
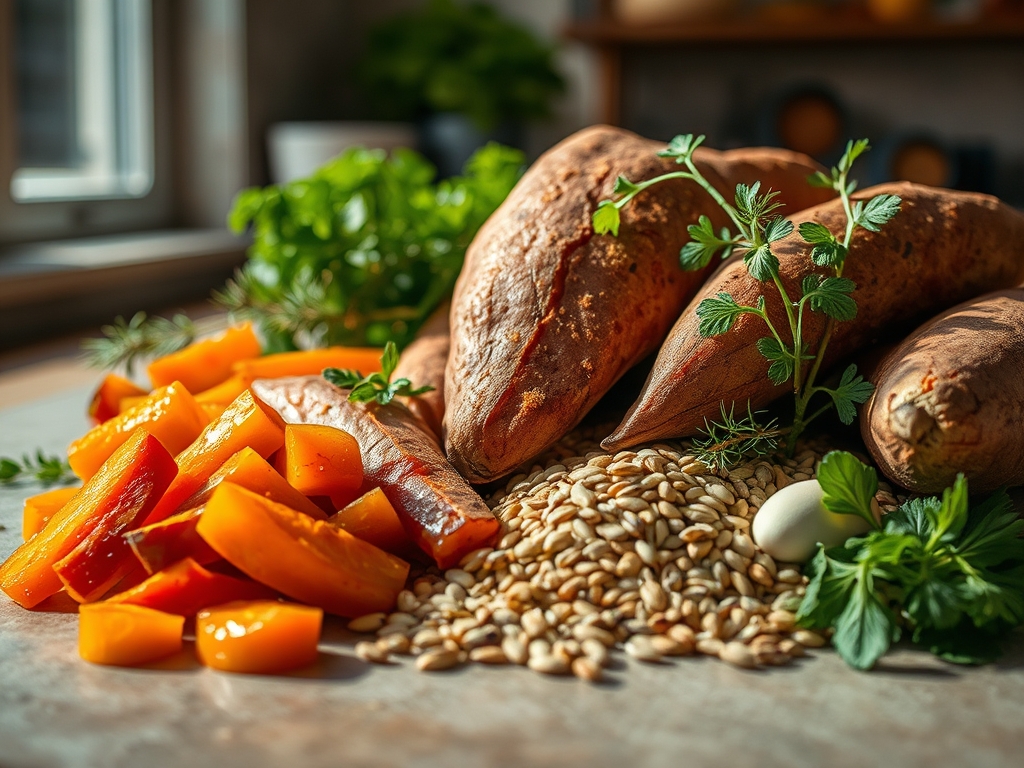
To achieve professional results, your mise-en-place must be precise. Start with high-starch sweet potatoes, such as the Beauregard or Jewel varieties, which contain the ideal moisture content for sugar concentration. You will need a heavy-bottomed skillet or a carbon steel roasting pan to ensure even heat distribution. A digital scale is your best friend here; measuring ingredients by weight ensures the perfect ratio of fats to sugars for a stable emulsion.
Your pantry list should include high-quality fats like clarified butter (ghee) or cold-pressed avocado oil. These have high smoke points, allowing you to render the exterior of the potato without burning the solids. For the glazes, gather viscous sweeteners like Grade A maple syrup, honey, or pomegranate molasses. Do not forget the aromatics: fresh ginger, star anise, and flaky sea salt. A microplane is essential for zesting citrus or grating fresh nutmeg directly into the glaze to preserve volatile oils.
Smart Substitutions:
If you are looking to pivot, swap honey for agave nectar to maintain a similar viscosity in vegan preparations. If you lack a heavy skillet, a double-layered baking sheet can mimic the heat retention needed for a proper crust. For a savory twist, replace cinnamon with smoked paprika or ground sumac to add a bright, acidic edge to the caramelization.
The Clock
Efficiency in the kitchen is about mastering the "Chef's Flow." Total active prep time for these caramelized sweet potato recipes is approximately 15 minutes, with a roasting duration of 35 to 45 minutes depending on the size of your dice. The key is the "rest and glaze" phase. You will roast the potatoes until they are 90 percent cooked, then apply the glaze for the final 5 minutes of high-heat exposure. This prevents the sugars from scorching while ensuring a thick, lacquer-like finish.
The Masterclass
1. The Precision Cut
Use a sharp chef's knife or a bench scraper to ensure all potato cubes are exactly one inch. Uniformity is not just for aesthetics; it ensures every piece reaches the same internal temperature simultaneously.
Pro Tip: This prevents "islands of rawness." Consistent surface area allows for uniform enzymatic browning, ensuring every bite has the same structural integrity.
2. The Initial Sear
Heat your oil in the skillet until it shimmers. Place the potatoes in a single layer, ensuring they do not crowd. If you hear a loud hiss, you are doing it right.
Pro Tip: Crowding the pan causes the potatoes to steam rather than sear. This is due to the rapid release of moisture which lowers the pan temperature below the Maillard reaction threshold.
3. The Deglaze and Infuse
Once the potatoes are golden, add your liquid aromatics. Use a wooden spoon to deglaze the pan, lifting the flavorful browned bits (the fond) from the bottom.
Pro Tip: Adding liquid at this stage creates a brief burst of steam that softens the pectin in the cell walls, ensuring a creamy interior.
4. The Glaze Emulsification
Whisk your chosen glaze ingredients in a small saucier before pouring them over the potatoes. Toss gently with tongs to coat every surface.
Pro Tip: A pre-emulsified glaze prevents the fat from separating. This creates a viscous coating that clings to the potato rather than pooling at the bottom of the pan.
5. The High-Heat Finish
Return the pan to the oven or crank the stovetop heat. Watch for the glaze to bubble and thicken into a dark, syrupy consistency.
Pro Tip: This is the "Caramelization Zone." The sugars are dehydrating and forming new carbon rings, which provides that bittersweet, complex flavor profile.
6. The Thermal Carryover Rest
Remove the potatoes from the heat while they still look slightly "wet." Let them sit in the pan for three minutes before serving.
Pro Tip: Thermal carryover means the potatoes continue to cook from residual heat. Resting allows the glaze to set into a tacky, professional-grade finish.
The Deep Dive
From a nutritional standpoint, sweet potatoes are a powerhouse of Beta-Carotene and fiber. While the glaze adds sugar, using natural sources like maple syrup provides trace minerals like manganese. For a Keto-friendly version, utilize Allulose as your sweetener; it is a rare sugar that actually undergoes caramelization unlike erythritol. For Vegan guests, swap butter for a high-quality coconut oil to add a subtle tropical note.
The Fix-It:
- The Glaze is Too Thin: Continue to simmer on medium heat. You need to evaporate more water to concentrate the sugars and increase the viscosity.
- The Potatoes are Mushy: You likely skipped the initial sear. Next time, ensure the pan is smoking hot before adding the vegetables to lock in the shape.
- The Sugar Tastes Bitter: You have moved past caramelization into carbonization. Immediately remove from heat and add a splash of heavy cream or butter to "stop" the cook and mellow the flavor.
Meal Prep:
To maintain "day-one" quality, reheat your caramelized sweet potato recipes in an air fryer or a toaster oven at 375 degrees. Avoid the microwave; it vibrates water molecules, which destroys the crisp sugar crust and turns the glaze into a soggy mess.
The Wrap-Up
Mastering caramelized sweet potato recipes is a gateway to understanding the delicate balance of heat, sugar, and fat. Whether you are serving the Miso-Maple glaze at a dinner party or the Spicy Honey version for a cozy weeknight meal, you now have the technical prowess to execute it perfectly. Remember, cooking is as much about the science of the molecules as it is about the soul of the ingredients. Now, get into that kitchen and start glowing.
The Kitchen Table
How do I get the glaze to stick to the potatoes?
Ensure the potatoes are dry before roasting. Excess surface moisture creates steam, which prevents the glaze from adhering. Always emulsify your glaze ingredients in a saucier before adding them to the pan for a thick, uniform coating.
Can I use canned sweet potatoes for these recipes?
Canned potatoes are already over-processed and lack the structural integrity for high-heat caramelization. They will likely disintegrate in the skillet. For the best results, always use fresh, firm tubers that you have peeled and diced yourself.
Why did my maple glaze burn so quickly?
Maple syrup has a high sugar concentration and a low burn point. Always add maple-based glazes during the last five to seven minutes of cooking. This allows enough time for the syrup to reduce without the sugars undergoing carbonization.
What is the best way to cut sweet potatoes evenly?
Use a sharp chef's knife and a bench scraper. Slice the potato into uniform planks first, then into sticks, and finally into cubes. Consistent sizing ensures that every piece undergoes the Maillard reaction at the exact same rate.