
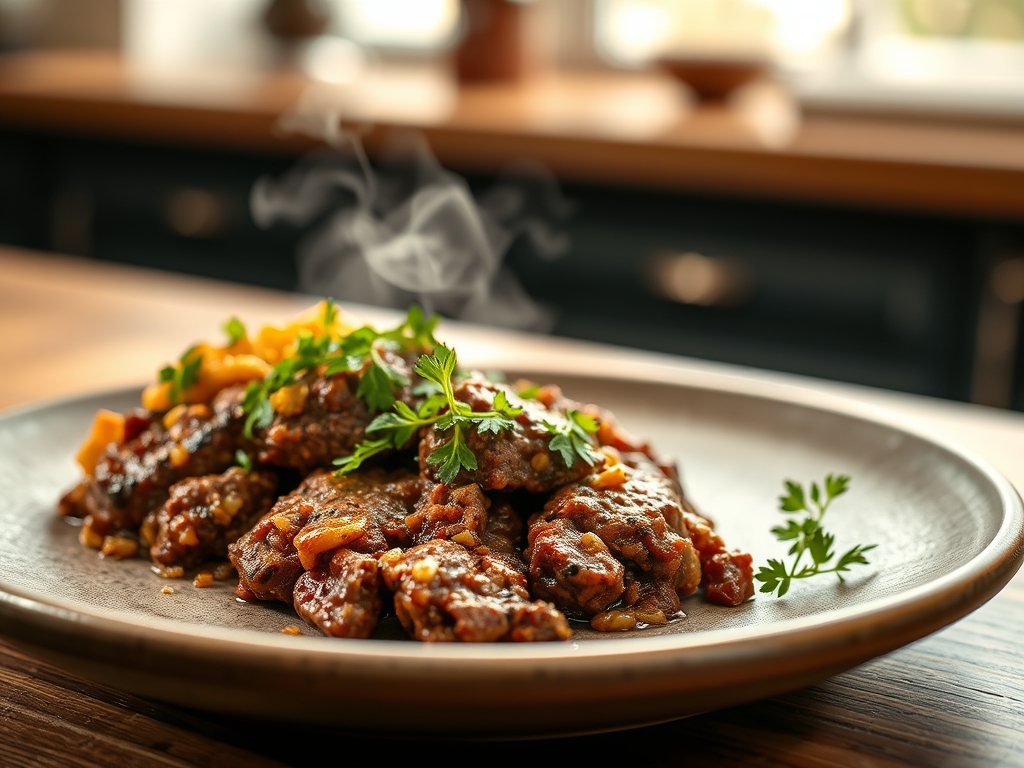
Picture the sizzle of a heavy bottomed skillet as it hits the perfect temperature; that rhythmic, aggressive pop of fat rendering into liquid gold. Finding comfort in low fodmap ground beef recipes does not mean sacrificing the deep, savory satisfaction of a well seared meal. We are reclaiming the kitchen with ten gentle, gut friendly masterpieces that prioritize flavor without the bloat.
The secret to mastering these dishes lies in understanding the molecular dance of the Maillard reaction. When you sear ground beef, you are not just cooking meat; you are rearranging amino acids and reducing sugars to create hundreds of different flavor compounds. For those of us navigating digestive sensitivities, we replace the traditional aromatic base of garlic and onions with infused oils and piquant herbs. This ensures every bite is rich, complex, and entirely safe for your system. We are focusing on high quality, grass fed proteins that offer a cleaner lipid profile, making these dinners as nutritious as they are delicious. Grab your favorite apron and a glass of wine; we are about to turn low fodmap cooking into a gourmet art form.
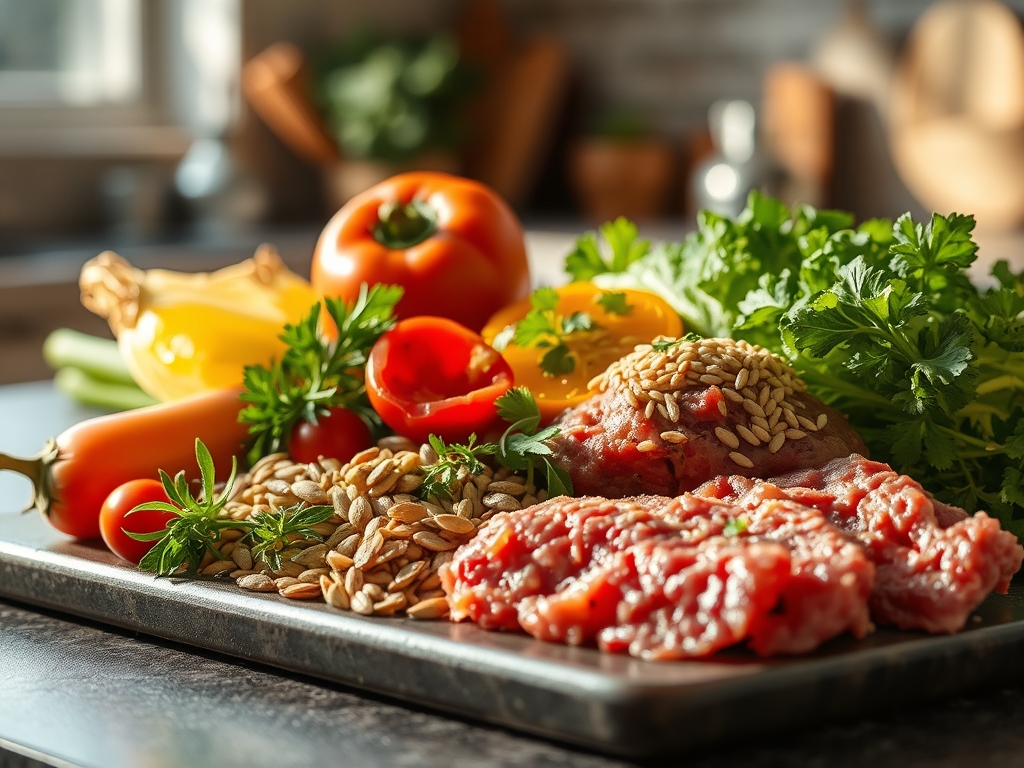
The Gathers:
Your mise en place is the foundation of culinary success. For these low fodmap ground beef recipes, your workstation should look like a laboratory of texture and scent. Start with premium ground beef, ideally an 80/20 blend. This specific ratio provides enough intramuscular fat to emulsify into sauces, creating a viscous, mouth coating richness without the need for heavy creams.
Next, assemble your "Smart Substitutions." Since we are avoiding fructans, your microplane will become your best friend for zesting citrus and grating fresh ginger. Use garlic infused olive oil, ensuring it is a true infusion with no physical garlic pieces, to provide that essential allium depth. For salt, reach for flaky sea salt or kosher salt to control the salinity with precision. Include fresh herbs like rosemary, thyme, and chives; these contain volatile oils that infuse the fat during the cooking process. Finally, keep a bottle of coconut aminos or gluten free tamari nearby to add a hit of umami that mimics the complexity of fermented soy without the wheat triggers.
The Clock
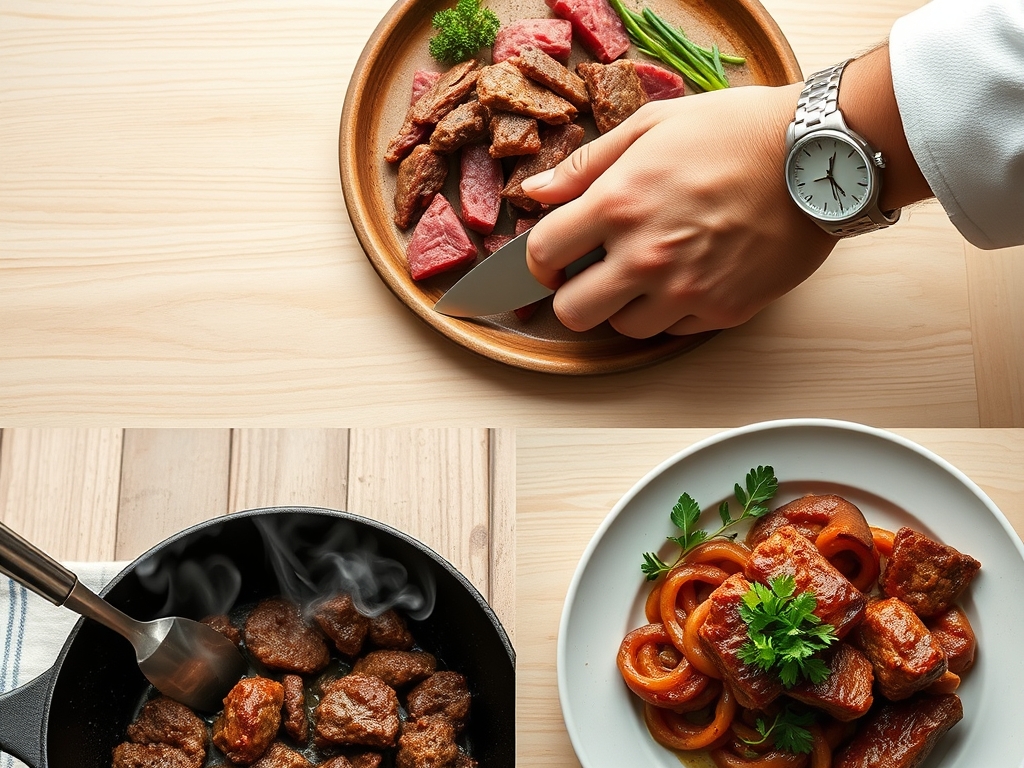
Efficiency in the kitchen is about "Chef's Flow," the ability to move between tasks without losing thermal momentum. Most of these recipes require a 15 minute preparation window and a 20 minute active cook time. Total time from fridge to table averages 35 to 40 minutes.
The flow begins with the "Cold Prep" phase, where you use a sharp chef's knife or a bench scraper to organize your chopped vegetables like carrots, red bell peppers, and the green tops of scallions. Next is the "Searing Phase," where the beef is browned to develop a crust. Finally, the "Simmer and Marry" phase allows the flavors to integrate. By the time your beef is resting, your kitchen should already be half cleaned, leaving you more time to enjoy the meal.
The Masterclass
1. Tempering the Protein
Before the meat touches the heat, take it out of the refrigerator for at least 20 minutes. Bringing the beef closer to room temperature prevents the muscle fibers from seizing when they hit the hot pan.
Pro Tip: This reduces the temperature gradient between the pan and the meat, preventing thermal shock which can cause the beef to steam in its own juices rather than sear.
2. The High Heat Sear
Heat your heavy-bottomed skillet until a drop of water dances and evaporates instantly. Add your infused oil, then the beef. Do not crowd the pan; if the beef covers more than 70 percent of the surface area, the moisture cannot escape fast enough.
Pro Tip: This stage facilitates enzymatic browning, creating the crust that houses the majority of the dish's savory profile. Use a stiff metal spatula to press the meat down for maximum surface contact.
3. Deglazing the Fond
Once the beef is browned and removed, you will see brown bits stuck to the bottom of the pan. This is called the "fond." Pour in a splash of beef bone broth or a dry white wine to lift these concentrated flavor crystals.
Pro Tip: This process uses solvent extraction to pull flavorful compounds back into the liquid phase, forming the base of a sophisticated, low fodmap sauce.
4. Aerating the Aromatics
Add your low fodmap vegetables and herbs to the deglazed pan. Use tongs to toss them frequently. This is when you add your dry spices, allowing them to bloom in the residual fat.
Pro Tip: Fat is a superior carrier for flavor; blooming spices in oil releases fat soluble flavor compounds that water based liquids cannot reach.
5. The Final Emulsification
Return the beef to the pan and add your liquid components, such as crushed tomatoes or starch thickened broth. Stir constantly with a saucier whisk to ensure the fats and liquids do not separate.
Pro Tip: This creates a stable emulsion, giving your sauce a silky texture that clings to pasta or rice without feeling greasy.
The Deep Dive
When we look at the macro nutrition of these low fodmap ground beef recipes, we see a powerhouse of bioavailability. A standard serving provides roughly 25 grams of protein, essential B12 vitamins, and heme iron, which is more easily absorbed by the body than plant based iron.
For dietary swaps, those following a Keto protocol can serve these beef dishes over cauliflower rice or sautéed zucchini ribbons. If you are looking for a Vegan alternative, crumbled firm tofu pressed with a digital scale to remove moisture can mimic the texture, though you will need to increase the umami additives like nutritional yeast.
The Fix-It
- The Meat is Gray and Tough: This happens when the pan is too cold or too crowded. Fix it by removing the meat, wiping the pan, reheating it until smoking, and searing the remaining meat in smaller batches.
- The Sauce is Broken: If you see oil pooling at the top, the emulsion has failed. Fix it by whisking in a teaspoon of mustard or a small slurry of cornstarch and water to re bind the fats.
- The Dish Tastes Flat: Usually a lack of acidity. Fix it by adding a squeeze of fresh lemon juice or a teaspoon of apple cider vinegar right before serving to brighten the heavy fats.
Meal Prep Science
To maintain "day-one" quality when reheating, avoid the microwave if possible. Reheat in a small saucepan over low heat with a tablespoon of broth. This prevents the proteins from denaturing further, which is what causes that rubbery, "leftover" texture.
The Wrap-Up
Mastering low fodmap ground beef recipes is a transformative journey for your palate and your gut. By focusing on the technical precision of the sear and the chemistry of infusions, you create meals that feel like a celebration rather than a restriction. These ten dinners prove that you can have it all; the sizzle, the scent, and the satisfaction; while keeping your digestive system completely at peace. Now, go forth and dominate that kitchen!
The Kitchen Table
Can I use frozen ground beef for these recipes?
Yes, but you must thaw it completely in the refrigerator first. Excess moisture from ice crystals will steam the meat instead of searing it, ruining the texture and preventing the Maillard reaction from occurring.
What is the best way to store leftovers?
Store in airtight glass containers for up to four days. Glass is non porous and won't retain odors or leach chemicals, ensuring the beef maintains its clean, savory flavor profile during refrigeration and reheating.
Why avoid garlic and onion powder?
Garlic and onions contain fructans, which are highly fermentable carbohydrates that cause distress for those with FODMAP sensitivities. Using garlic infused oil provides the flavor without the indigestible fibers that trigger bloating.
How do I make the beef more tender?
Avoid overworking the meat when it is raw. Over handling develops the proteins too much, leading to a dense, tough result. For maximum tenderness, use a fork to gently break the meat apart in the pan.