
Close your eyes and imagine the scent of cold earth meeting sizzling butter. In the heart of a Slavic winter, the potato is not just a side dish; it is the currency of survival and the soul of the table. Mastering authentic russian potato recipes requires more than just boiling water. It demands an understanding of starch structures and the glorious, golden magic of the Maillard reaction. We are diving into a world where the humble tuber is transformed into silk, lace, and crispy gold. Whether you are craving the crunch of a pan-fried slice or the cloud-like loft of a puree, these techniques will turn your kitchen into a professional laboratory of comfort.
The Gathers:
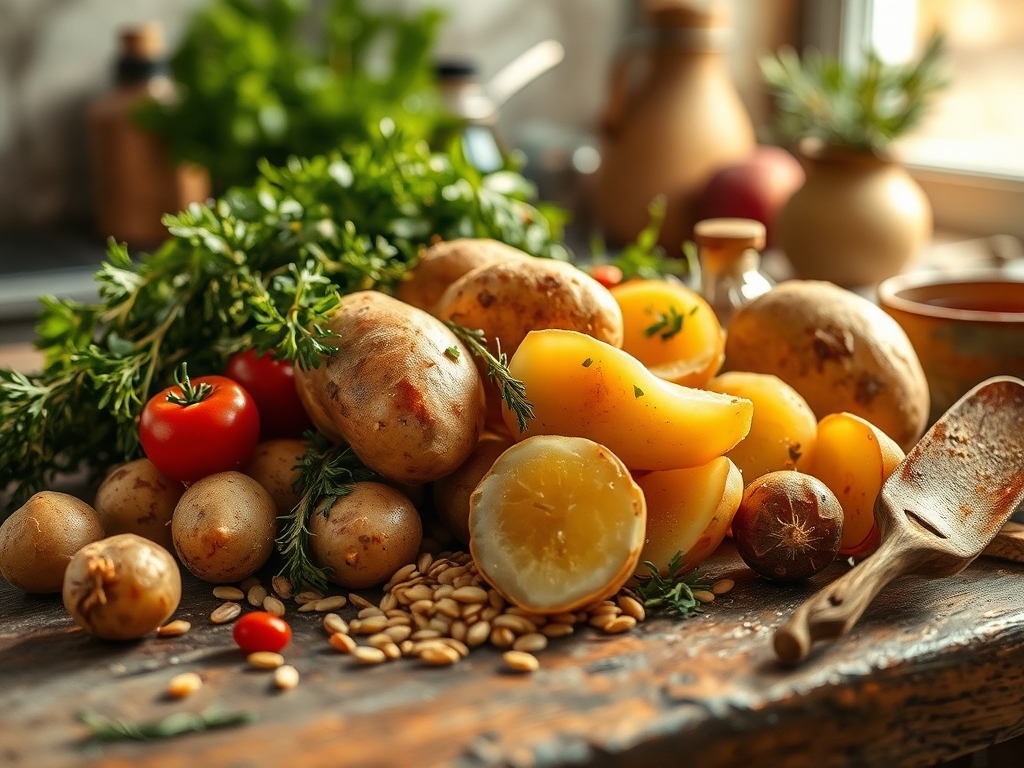
To execute these russian potato recipes with precision, your mise-en-place must be impeccable. Start with high-starch Russets for frying and waxy Yukon Golds for salads. You will need a heavy-bottomed skillet, preferably cast iron, to ensure even heat distribution and prevent hot spots that lead to uneven browning. A digital scale is non-negotiable for consistent results; measuring by weight ensures the ratio of starch to fat is chemically balanced.
Gather fresh dill, which contains essential oils that infuse the fat, and high-fat sour cream (smetana) for that signature piquant acidity. You will also need a bench scraper for portioning dough and a microplane to finely grate garlic into a viscous paste.
Smart Substitutions:
If you cannot find traditional smetana, whisk heavy cream with a touch of lemon juice to mimic the lactic acid profile. For a vegan twist, replace butter with a high-quality neutral oil and use coconut cream to maintain the mouthfeel of animal fats. If you are dodging gluten, substitute wheat flour with a 1:1 gluten-free blend enriched with xantham gum to preserve the structural integrity of your potato cakes.
The Clock
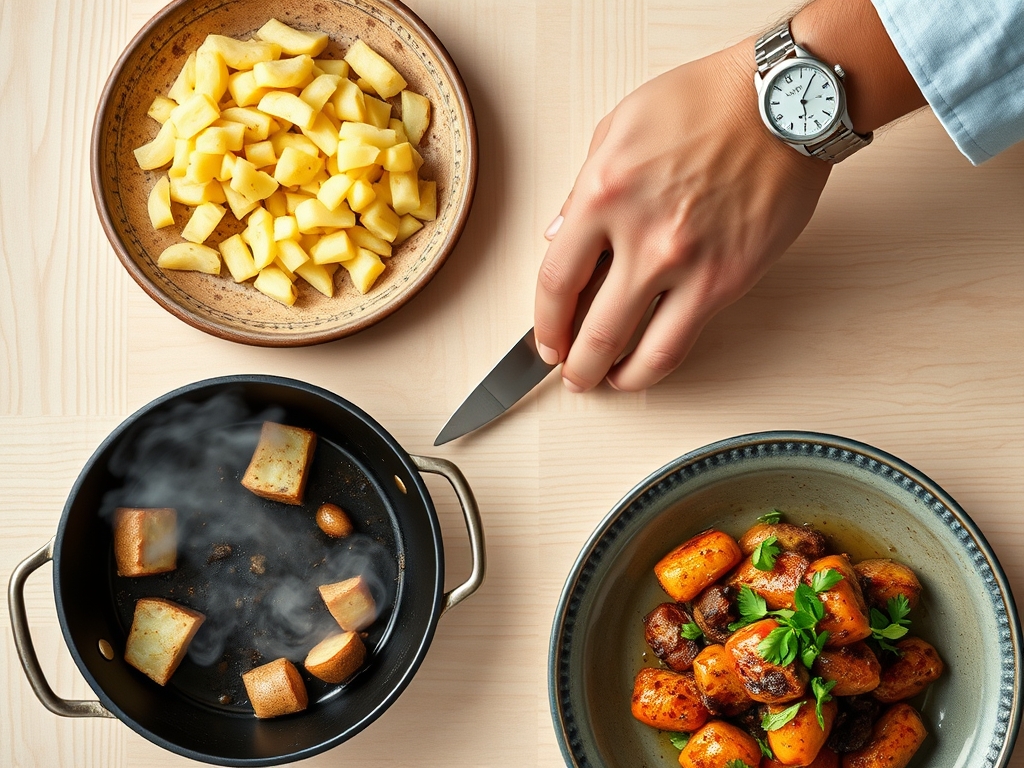
Efficiency in the kitchen is about "Chef's Flow." Total preparation for these six classics spans approximately two hours if you multitask. Start by boiling the potatoes for your salads and mashes first, as this allows the thermal energy to dissipate before you handle them. While the tubers simmer, use your mandoline to prep the thin slices for frying.
The "Flow" dictates that you work from the longest cook times to the shortest. The braised dishes require 40 minutes of gentle simmering to render fats, while the pan-fried varieties take only 12 minutes of active high-heat work. By the time your fried potatoes are hitting the wire rack to drain, your mash will be ready for its final aeration.
The Masterclass
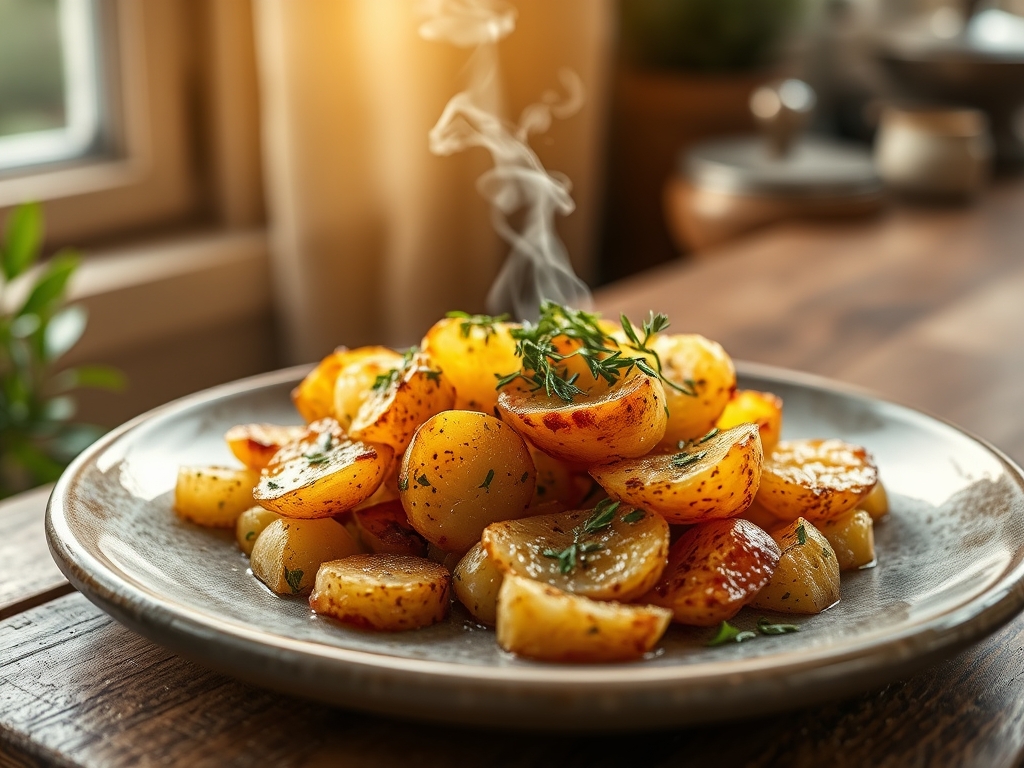
1. The Golden Pan-Fry (Zhareniya Kartoshka)
Slice your potatoes into uniform batons using a sharp chef's knife. Heat your heavy-bottomed skillet with a mix of sunflower oil and butter. Add the potatoes in a single layer, resisting the urge to stir for at least five minutes. This allows the sugars to undergo the Maillard reaction, creating a deep crust.
Pro Tip: Do not salt the potatoes until the very end. Salt draws out moisture through osmosis; if you salt early, the potatoes will steam in their own juices rather than crisping, resulting in a soggy texture.
2. The Velvet Mash (Kartofelnoye Pyure)
Boil peeled Yukon Golds in heavily salted water until the pectin breaks down. Pass the hot potatoes through a ricer or food mill into a saucier. This mechanical separation prevents the starches from becoming "gluey" by minimizing the rupture of starch granules.
Pro Tip: Always heat your milk and butter before adding them to the mash. Cold liquids shock the starch molecules and cause them to seize, which ruins the viscous, silky consistency you are aiming for.
3. The Draniki (Potato Pancakes)
Grate raw potatoes and onions into a bowl. Use a clean kitchen towel to wring out every drop of excess liquid. The goal is to remove the water while keeping the natural potato starch. Mix with a single egg and a tablespoon of flour to bind the matrix.
Pro Tip: The onion juice does more than add flavor; it contains antioxidants that prevent enzymatic browning. This keeps your batter pale and beautiful instead of turning an unappetizing grey while you fry.
4. The Olivier Salad Base
Boil whole, unpeeled potatoes. Once cooled, peel and dice them into perfect 5mm cubes. The skin-on boiling method traps the starch inside the tuber, ensuring the cubes hold their shape when tossed with mayo and pickles.
Pro Tip: Use a bench scraper to transfer your cubes to the bowl. This prevents the delicate edges from crushing, maintaining the structural integrity of the salad's "dice" for a professional presentation.
5. Selyodka Pod Shuboy (Shuba) Layers
This "Herring under a Fur Coat" requires grating boiled potatoes into a light, airy layer. Do not pack the potatoes down. Use a microplane for the final beet layer to ensure the juices infuse the potato layer beneath.
Pro Tip: Allow the dish to rest in the fridge for at least four hours. This allows the flavors to osmose through the layers, creating a unified taste profile that is far superior to a freshly assembled version.
6. The Country Braise (Zharkoye)
Sear cubes of beef or mushrooms in a saucier, then add potato chunks and a splash of broth. Cover and simmer. The potato starch will naturally thicken the liquid into a rich, velvety gravy as it breaks down.
Pro Tip: Add a dollop of sour cream at the very end, off the heat. If you boil the sour cream, the proteins will denature and "break," resulting in a grainy sauce instead of a smooth emulsion.
The Deep Dive
Macro Nutrition:
Potatoes are a powerhouse of potassium and Vitamin C. A standard serving of these russian potato recipes provides roughly 250 to 400 calories, depending on the fat ratio. To keep it lean, focus on the boiled and braised versions, which utilize moisture rather than deep-frying.
Dietary Swaps:
For Keto followers, swap the potato for cauliflower or daikon radish; though the starch profile differs, the flavor carriers like dill and garlic remain identical. For a Vegan approach, use cultured cashew cream to replace the smetana.
The Fix-It:
- Gluey Mash: You over-worked the starch. Fix it by spreading it in a baking dish, topping with cheese, and turning it into a gratin.
- Burnt Bottoms: Your heat was too high for the sugar content. Next time, soak sliced potatoes in cold water for 30 minutes to remove excess surface starch.
- Bland Flavor: You forgot to salt the boiling water. Fix it by folding in finely grated parmesan or a touch of concentrated bouillon.
Meal Prep:
To reheat, avoid the microwave. Use a heavy-bottomed skillet with a teaspoon of water and a lid to create a steam-chamber. This rehydrates the starch molecules without making the exterior rubbery.
The Wrap-Up
You are now armed with the chemical secrets to the perfect Slavic feast. From the mechanical precision of the ricer to the thermal management of the cast iron pan, these russian potato recipes are your ticket to culinary mastery. Go forth, embrace the starch, and remember that the best secret ingredient is always a generous hand with the fresh dill.
The Kitchen Table
How do I stop my potato pancakes from turning grey?
Grate a small amount of white onion directly into the potato mixture. The sulfur compounds and antioxidants in the onion prevent the enzymatic browning that occurs when raw potato cells are exposed to oxygen.
What is the best potato for Russian salad?
Use waxy varieties like Yukon Gold or Red Bliss. These have less starch and more moisture, allowing them to maintain their cubed shape after boiling and mixing, rather than disintegrating into a mash.
Can I make these recipes ahead of time?
Yes, but fried dishes like Draniki lose their crispness. Reheat them in a 400-degree oven on a wire rack to allow hot air to circulate, which restores the crunch through moisture evaporation.
Why is my mashed potato sticky like glue?
You likely used a food processor or over-mashed by hand. This ruptures the starch granules, releasing amylose which creates a sticky paste. Use a ricer for a light, fluffy, and professional texture.