
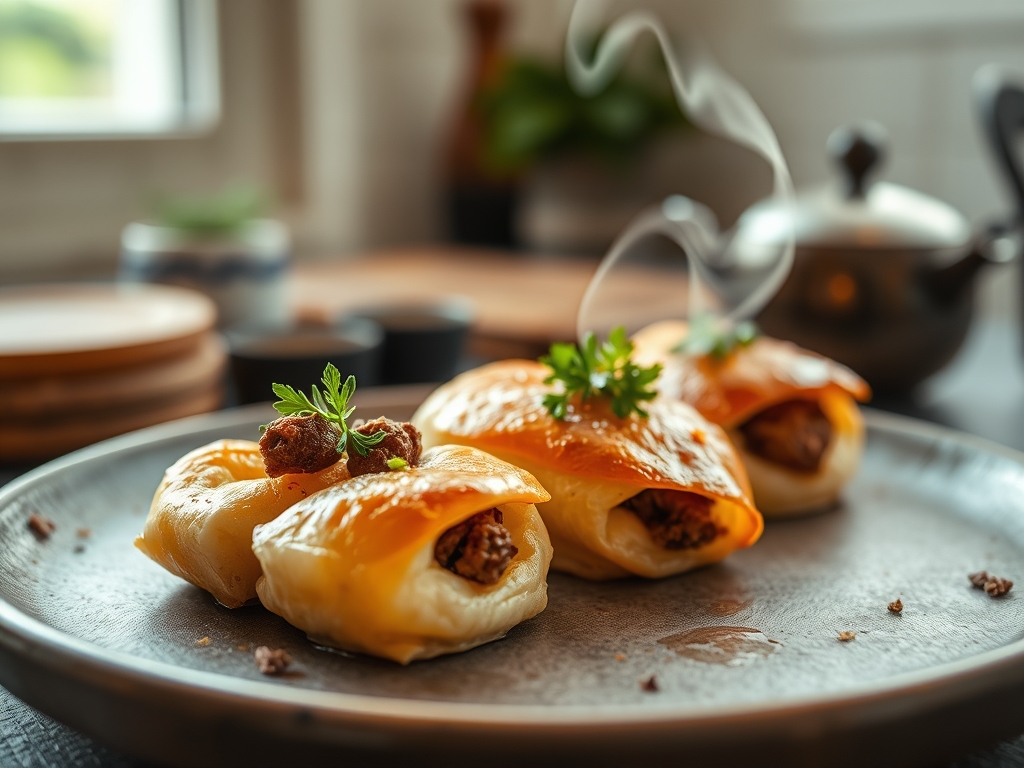
Imagine the scent of buttery, laminated dough shattering under your fork to reveal a savory, spice-kissed center of premium wagyu. Mastering puff pastry and ground beef recipes is the ultimate culinary flex; it combines the architectural precision of French pastry with the primal satisfaction of perfectly seared protein. It is about texture, tension, and that glorious golden crunch.
The secret to these bold delicacies lies in the physics of the bake. When cold butter hits a hot oven, it creates steam that lofts hundreds of microscopic layers of flour into a crisp lattice. When paired with the rich, umami-heavy profile of ground beef, you create a dish that is both sophisticated and incredibly comforting. Whether you are crafting a refined Beef Wellington bite or a spicy Moroccan-inspired pastry roll, the goal is always the same: a dry, crisp bottom and a succulent, juicy interior. Let us dive into the chemistry of the perfect bite.
The Gathers:
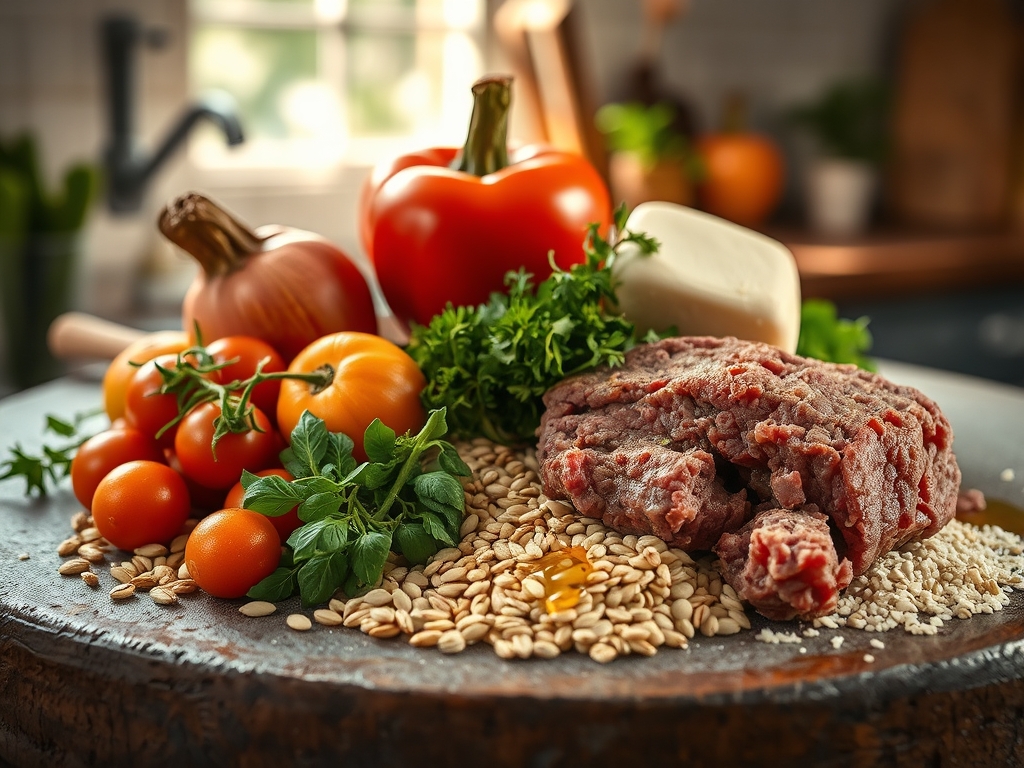
To achieve professional results, your mise-en-place must be meticulous. Start with high-quality ground beef, preferably a 20 percent fat blend. This fat content is crucial because it will render during the cooking process, providing the moisture necessary to keep the meat from becoming granular or dry. You will need a heavy-bottomed skillet to ensure even heat distribution and a microplane for finely grating aromatics like garlic and ginger, which allows them to melt into the meat fibers.
Your pantry should include piquant elements like Dijon mustard or Worcestershire sauce to provide an acidic counterpoint to the fat. For the pastry, ensure it is kept at exactly 40 degrees Fahrenheit until the moment of assembly. If the butter in the dough reaches room temperature, it will soak into the flour rather than creating steam, resulting in a greasy, flat mess.
Smart Substitutions: If you want to lighten the profile, swap the beef for ground bison, which offers a leaner, more iron-rich flavor. For those avoiding gluten, there are now incredible high-fat gluten-free puff pastries available that utilize xanthan gum to mimic the elasticity of wheat gluten. If you lack a saucier for your reductions, a small saucepan with rounded sides will work perfectly to prevent scorching in the corners.
The Clock: Timing the Masterpiece
The "Chef's Flow" is all about managing temperature. Total active prep time is approximately 40 minutes, but you must account for the "chill intervals." After you sauté your beef and aromatics, the mixture must be completely cold before it touches the pastry. This prevents the dreaded "soggy bottom" caused by premature fat melting.
Plan for 20 minutes of searing and seasoning, 30 minutes of cooling the filling in the refrigerator, and 15 minutes for assembly. The bake itself usually takes 20 to 25 minutes at a high temperature, typically 400 degrees Fahrenheit. This high-heat "shock" is what triggers the rapid expansion of the dough layers. Total time from start to table is roughly 90 minutes, but the results are worth every second of patience.
The Masterclass: Step-by-Step
1. The Maillard Sear
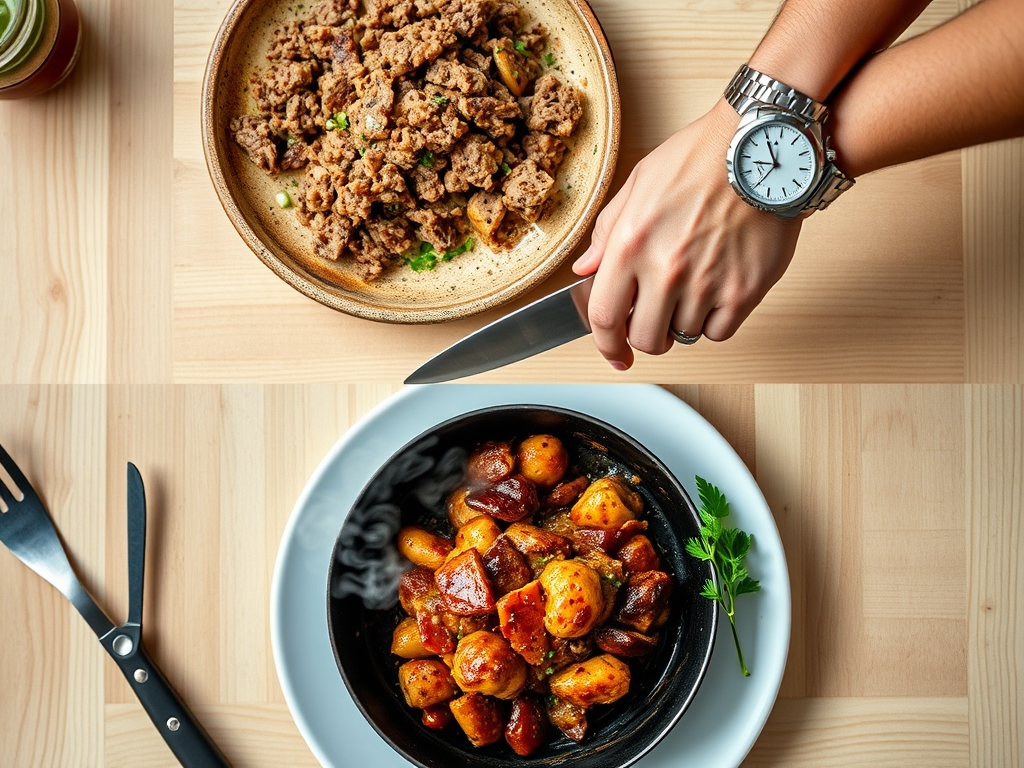
Heat your heavy-bottomed skillet until it is wisps-of-smoke hot. Add your ground beef in a single layer. Do not stir immediately. Allow the meat to develop a deep, mahogany crust. This is the Maillard reaction, a chemical dance between amino acids and reducing sugars that creates hundreds of new flavor compounds.
Pro Tip: Use a digital scale to portion your meat exactly. Even sizing ensures that every piece reaches the same internal temperature simultaneously, preventing overcooked, rubbery bits.
2. Deglazing the Fond
Once the meat is browned, remove it and leave the fat. Toss in minced shallots and use a splash of dry sherry or beef stock to deglaze the pan. Scrape up the "fond," those brown bits stuck to the bottom, which contain the concentrated essence of the beef.
Pro Tip: This step utilizes solvent extraction to pull flavors from the pan and incorporate them back into the filling, ensuring no flavor is wasted.
3. The Cooling Phase
Spread your cooked beef mixture onto a flat baking sheet and place it in the fridge. Increasing the surface area allows the heat to dissipate rapidly through convection, stopping the cooking process and preventing the carryover heat from toughening the proteins.
Pro Tip: Never skip this. If you put warm meat on puff pastry, the butter in the dough will melt instantly, destroying the lamination before it even hits the oven.
4. Precision Assembly
Roll out your chilled puff pastry on a lightly floured surface using a bench scraper to keep the edges clean. Place a measured amount of the cold beef mixture onto the dough. Brush the edges with an egg wash, which acts as a protein-based adhesive to seal the pastry shut.
Pro Tip: The egg wash also aids in enzymatic browning, giving your finished pastry that professional, lacquered mahogany sheen.
5. The Expansion Bake
Place your assembled pastries on a parchment-lined sheet and slide them into a preheated oven. Watch through the glass as the layers aerate and rise. The water content in the butter turns to steam, pushing the flour layers apart while the fat fries each layer individually.
Pro Tip: Avoid opening the oven door. A sudden drop in temperature can cause the delicate steam-filled pockets to collapse, resulting in a dense, heavy pastry.
6. The Rest and Carryover
Once golden, remove the pastries and let them rest on a wire rack for five minutes. This allows the internal juices to redistribute and the crust to fully set.
Pro Tip: This utilizes thermal carryover. The internal temperature will continue to rise by about 5 degrees after removal, finishing the cook perfectly without drying out the meat.
The Deep Dive: Science and Solutions
From a macro perspective, these puff pastry and ground beef recipes are powerhouses of protein and energy-dense fats. A single serving typically provides 25 grams of protein and 30 grams of fats. To make this Keto-friendly, you can replace the puff pastry with a "Fathead" dough made of mozzarella and almond flour. For a vegan twist, use a plant-based "bleeding" ground and a vegan puff pastry made with vegetable shortening.
The Fix-It: Common Pitfalls
- The Soggy Bottom: If your pastry is wet underneath, your filling was too liquid. Next time, use a slotted spoon to drain excess fat before assembly.
- The Blowout: If the pastry bursts, you likely trapped too much air inside. Use a fork to prick small steam vents in the top of the dough.
- Pale Crust: If the pastry is cooked but pale, your oven temperature was too low. Use an oven thermometer to verify you are hitting a true 400 degrees.
Meal Prep Magic: To reheat, avoid the microwave at all costs. The microwave excites water molecules, turning the pastry soft and rubbery. Instead, use an air fryer or toaster oven at 350 degrees for five minutes to re-crisp the fat layers and restore that "day-one" crunch.
The Wrap-Up
You are now armed with the molecular secrets to creating world-class beef pastries. By respecting the temperature of your fats and the chemistry of the Maillard reaction, you can transform humble ground beef into a sophisticated culinary experience. Remember: stay cold during prep, stay hot during the bake, and always let the meat rest. Now, get into that kitchen and show those layers who is boss!
The Kitchen Table
Why is my puff pastry not rising?
The most common cause is warm dough. If the butter layers melt before the pastry hits the oven, the steam cannot push the layers apart. Always keep your dough chilled until the very last second before baking.
Can I freeze these beef pastries before baking?
Yes, and they actually bake better from frozen! Assemble them completely, freeze on a tray, and then transfer to a bag. Bake directly from the freezer, adding about five to eight minutes to the total baking time.
What is the best fat ratio for the beef?
An 80/20 ratio is ideal. The 20 percent fat content provides the necessary moisture and flavor to withstand the high heat of the oven without the meat becoming dry or crumbly inside the pastry shell.
How do I prevent the meat from shrinking?
Do not overwork the meat when seasoning. Over-mixing develops too much myosin, which creates a tight, rubbery texture. Gently fold in your spices and aromatics to keep the protein structure loose and tender.