
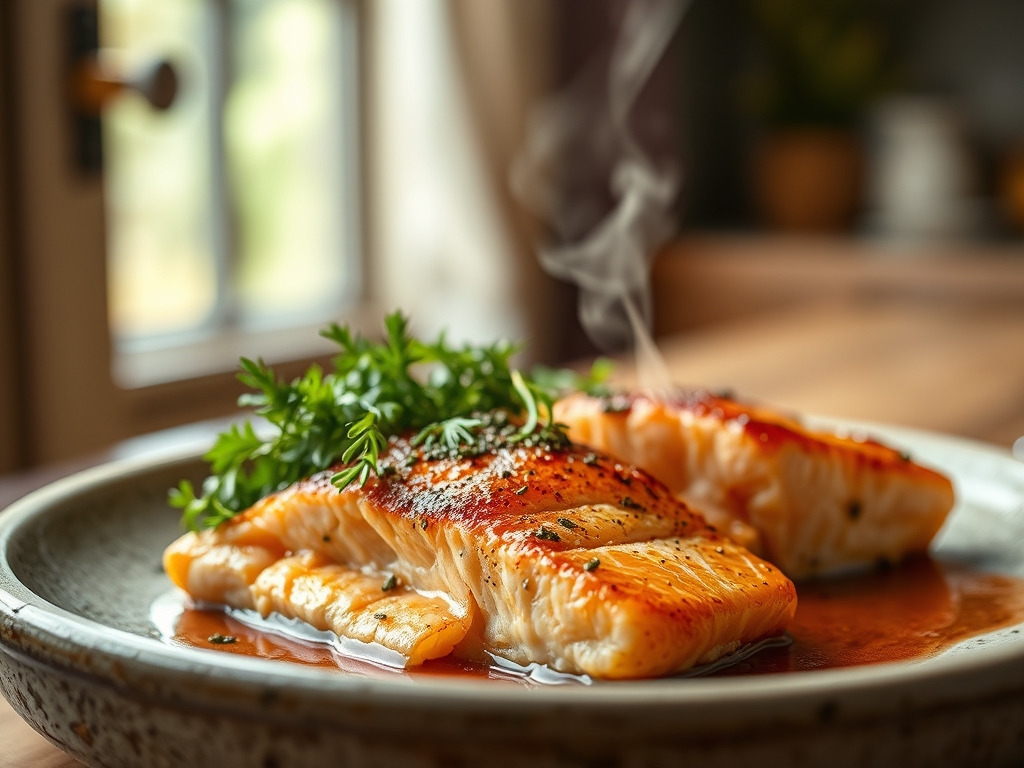
Picture the scene: a heavy-bottomed skillet rests on the burner, radiating a steady, shimmering heat. You lay a cold, salt-cured fillet into the pan, and the immediate sizzle is a symphony of moisture meeting high-velocity lipids. The kitchen fills with the scent of toasted butter and sea salt, a visceral signal that something transformative is happening to your dinner. Achieving that elusive, glass-shattering skin and a translucent, buttery center is the hallmark of the most coveted perfect salmon recipes. It is not just about heat; it is about the mastery of protein denaturation and moisture retention. Most home cooks struggle with the dreaded white albumin weeping from the sides or a texture that feels more like chalk than silk. I am here to tell you that professional results are a matter of physics and chemistry, not luck. By the time we finish this deep dive, you will possess the technical precision of a line cook and the intuitive grace of a seasoned chef, ensuring every fillet is a masterpiece of culinary architecture.
The Gathers:
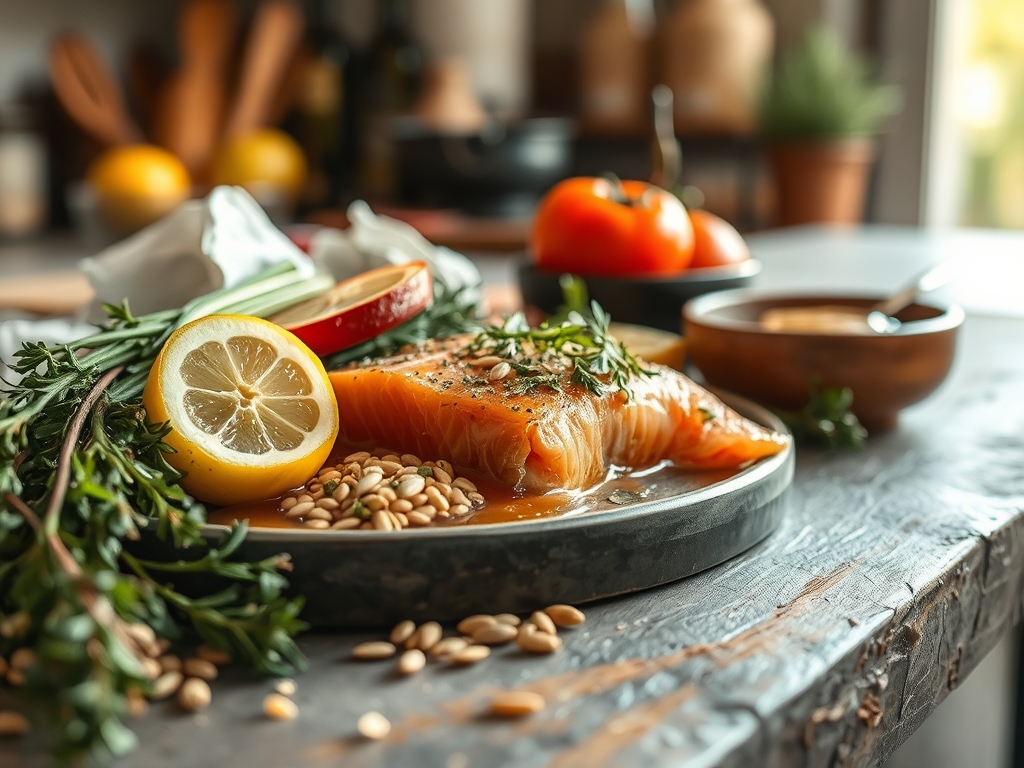
Before the first spark of the stove, we must assemble our mise-en-place with surgical intent. You will need a center-cut Atlantic or King salmon fillet, preferably with the skin intact to act as a thermal insulator. Use a digital scale to ensure your portions are uniform; 170 grams is the sweet spot for even heat distribution. Your fat source should be high-smoke point, such as avocado oil or clarified butter, to prevent bitter carbonization during the searing process. For the aromatics, gather fresh thyme, unpeeled garlic cloves to prevent scorching, and a lemon for a bright, piquant finish.
Smart Substitutions: If you cannot find high-quality fresh salmon, high-grade frozen fillets are scientifically superior to "previously frozen" seafood that has sat in a display case. If you are avoiding dairy, swap the finishing butter for a viscous emulsification of olive oil and a splash of pasta water or vegetable stock to create a silky pan sauce. Use a microplane to zest your citrus directly over the fish at the very end; the volatile oils are delicate and will dissipate if exposed to prolonged heat.
The Clock:
Mastering the "Chef's Flow" is about synchronizing your movements to the thermal velocity of the pan. Total preparation takes exactly 15 minutes of active focus. You will spend 10 minutes on the "Dry Cure" to draw out surface moisture. The actual cooking time is a swift 6 to 8 minutes, depending on the thickness of the fillet.
The flow is simple: Prep while the pan preheats, sear while you baste, and rest while you plate. Professionals never rush the rest period. A 3 minute rest allows the internal juices to redistribute. If you cut into the fish the moment it leaves the heat, the pressure differential will force the moisture out, leaving you with a dry result despite your best efforts.
The Masterclass:
1. The Desiccation Ritual
Use a paper towel to pat the skin bone-dry. Any residual moisture will turn to steam, preventing the Maillard reaction and leaving the skin rubbery. Use a bench scraper to move the fillets without bruising the delicate flesh.
Pro Tip: This is about latent heat of vaporization. If the surface is wet, the energy goes into evaporating water instead of browning the protein. Dry skin equals crispy skin.
2. The Cold-Pan Start or High-Heat Sear
For beginners, place the skin-side down in a cold heavy-bottomed skillet and then turn on the heat. This allows the fat to render slowly, resulting in a chip-like crunch. For pros, a smoking hot pan creates an immediate sear.
Pro Tip: Starting cold prevents the protein fibers from "shocking" and curling, which often causes uneven cooking across the surface of the fillet.
3. The Weight Technique
As soon as the fish hits the pan, use a fish spatula or a heavy weight to press the fillet down for 30 seconds. This ensures maximum surface contact between the skin and the hot metal.
Pro Tip: Proteins contract when they hit heat. Pressing them flat prevents the edges from curling up, ensuring the entire surface undergoes enzymatic browning simultaneously.
4. The Butter Baste (Arrosé)
Once the skin is crisp and the fish is 70 percent cooked, flip it gently. Toss in a knob of butter, garlic, and herbs. Use a large spoon to continuously shower the fish with the foaming fat.
Pro Tip: This technique, known as infusing, uses the butter as a vehicle for heat and flavor, gently finishing the top of the fish without overcooking the delicate interior.
5. The Thermal Pull
Remove the salmon from the pan when the internal temperature hits 125 degrees Fahrenheit for medium-rare. Use a digital thermometer for total accuracy.
Pro Tip: This accounts for thermal carryover. The internal temperature will continue to rise by 5 to 7 degrees while resting, bringing it to a perfect 130-132 degrees.
The Deep Dive:
Salmon is a nutritional powerhouse, dense with Omega-3 fatty acids, high-quality protein, and Vitamin B12. From a dietary perspective, this preparation is naturally Gluten-Free and Keto-friendly. For a Vegan alternative, use this same searing technique on thick "steaks" of cauliflower or lion's mane mushrooms, using a miso-glaze to replicate the savory depth of the fish.
The Fix-It:
- White Stuff (Albumin): This happens when the heat is too high, too fast. Fix it by lowering the flame and using the cold-pan start.
- Sticking Skin: You likely tried to flip it too early. The fish will naturally "release" from the pan once the proteins have fully seared.
- Fishy Odor: This is caused by trimethylamine. A quick soak in milk for 10 minutes before cooking can neutralize these odors.
Meal Prep Magic: To reheat salmon without it becoming a brick, avoid the microwave. Use a low oven (275 degrees) with a splash of water and a tight foil cover. This creates a gentle steam chamber that restores the viscous texture of the fats without tightening the protein fibers.
The Wrap-Up:
You are now armed with the technical secrets that separate the amateurs from the icons. Cooking the perfect salmon is an act of mindfulness; it requires you to listen to the sizzle, watch the opacity of the flesh change, and respect the rest period. Whether you are hosting a high-stakes dinner party or just treating yourself to a Tuesday night win, these steps ensure a restaurant-quality result every single time. Now, grab your tongs, fire up that skillet, and go claim your culinary crown!
The Kitchen Table:
How do I prevent salmon from sticking to the pan?
Ensure your pan is properly seasoned or use a high-quality stainless steel skillet. Pat the skin completely dry and wait for the fish to naturally release before attempting to flip it. Forcing the flip will tear the delicate skin.
What is the best temperature for cooked salmon?
For a buttery, flakey texture, aim for an internal temperature of 125 to 130 degrees Fahrenheit. This allows for thermal carryover to reach the ideal 135 degrees during the resting phase, preventing the protein from becoming dry or chalky.
Can I cook salmon with the skin off?
Yes, but you lose the natural thermal barrier that protects the flesh from direct heat. If cooking skinless, use lower heat and shorter cook times, or consider poaching the fish in a saucier to maintain its delicate moisture levels.
How do I get rid of the white stuff on salmon?
That white substance is albumin, a harmless protein. To minimize it, cook the fish more slowly at a lower temperature and avoid overcooking. A brief brine in salt water before cooking can also help tighten the protein structure.